This post was written for Xperience by Kentico v29.0.0. Please consult the documentation for any feature or API changes when using a different version. Be sure to check the System Requirements in the product documentation.
To continue the previous blog post in this series - Extending Xperience by Kentico Administration UI Pages - we'll be looking at another helpful way to extend the Xperience administration UI, this time to assist developers tracking deployments in multiple environments.
If you use a modern approach to application development, with continuous integration and deployments, you likely have dev ops tooling that tells you what version of your application is in each environment (ex: Development, QA, Production). This information is helpful when you are working with stakeholders to validate which bugs 🐜 have been resolved, which resolutions still need testing, which features are available, and which lines of code from source control are actually executing.
Wouldn't it be nice if this information was also available in the Xperience by Kentico administration dashboard? This would help stakeholders quickly see the "version" of their Xperience solution that was deployed and developers could also see the commit hash without having to jump back into the dev ops tools 🙌🏽.
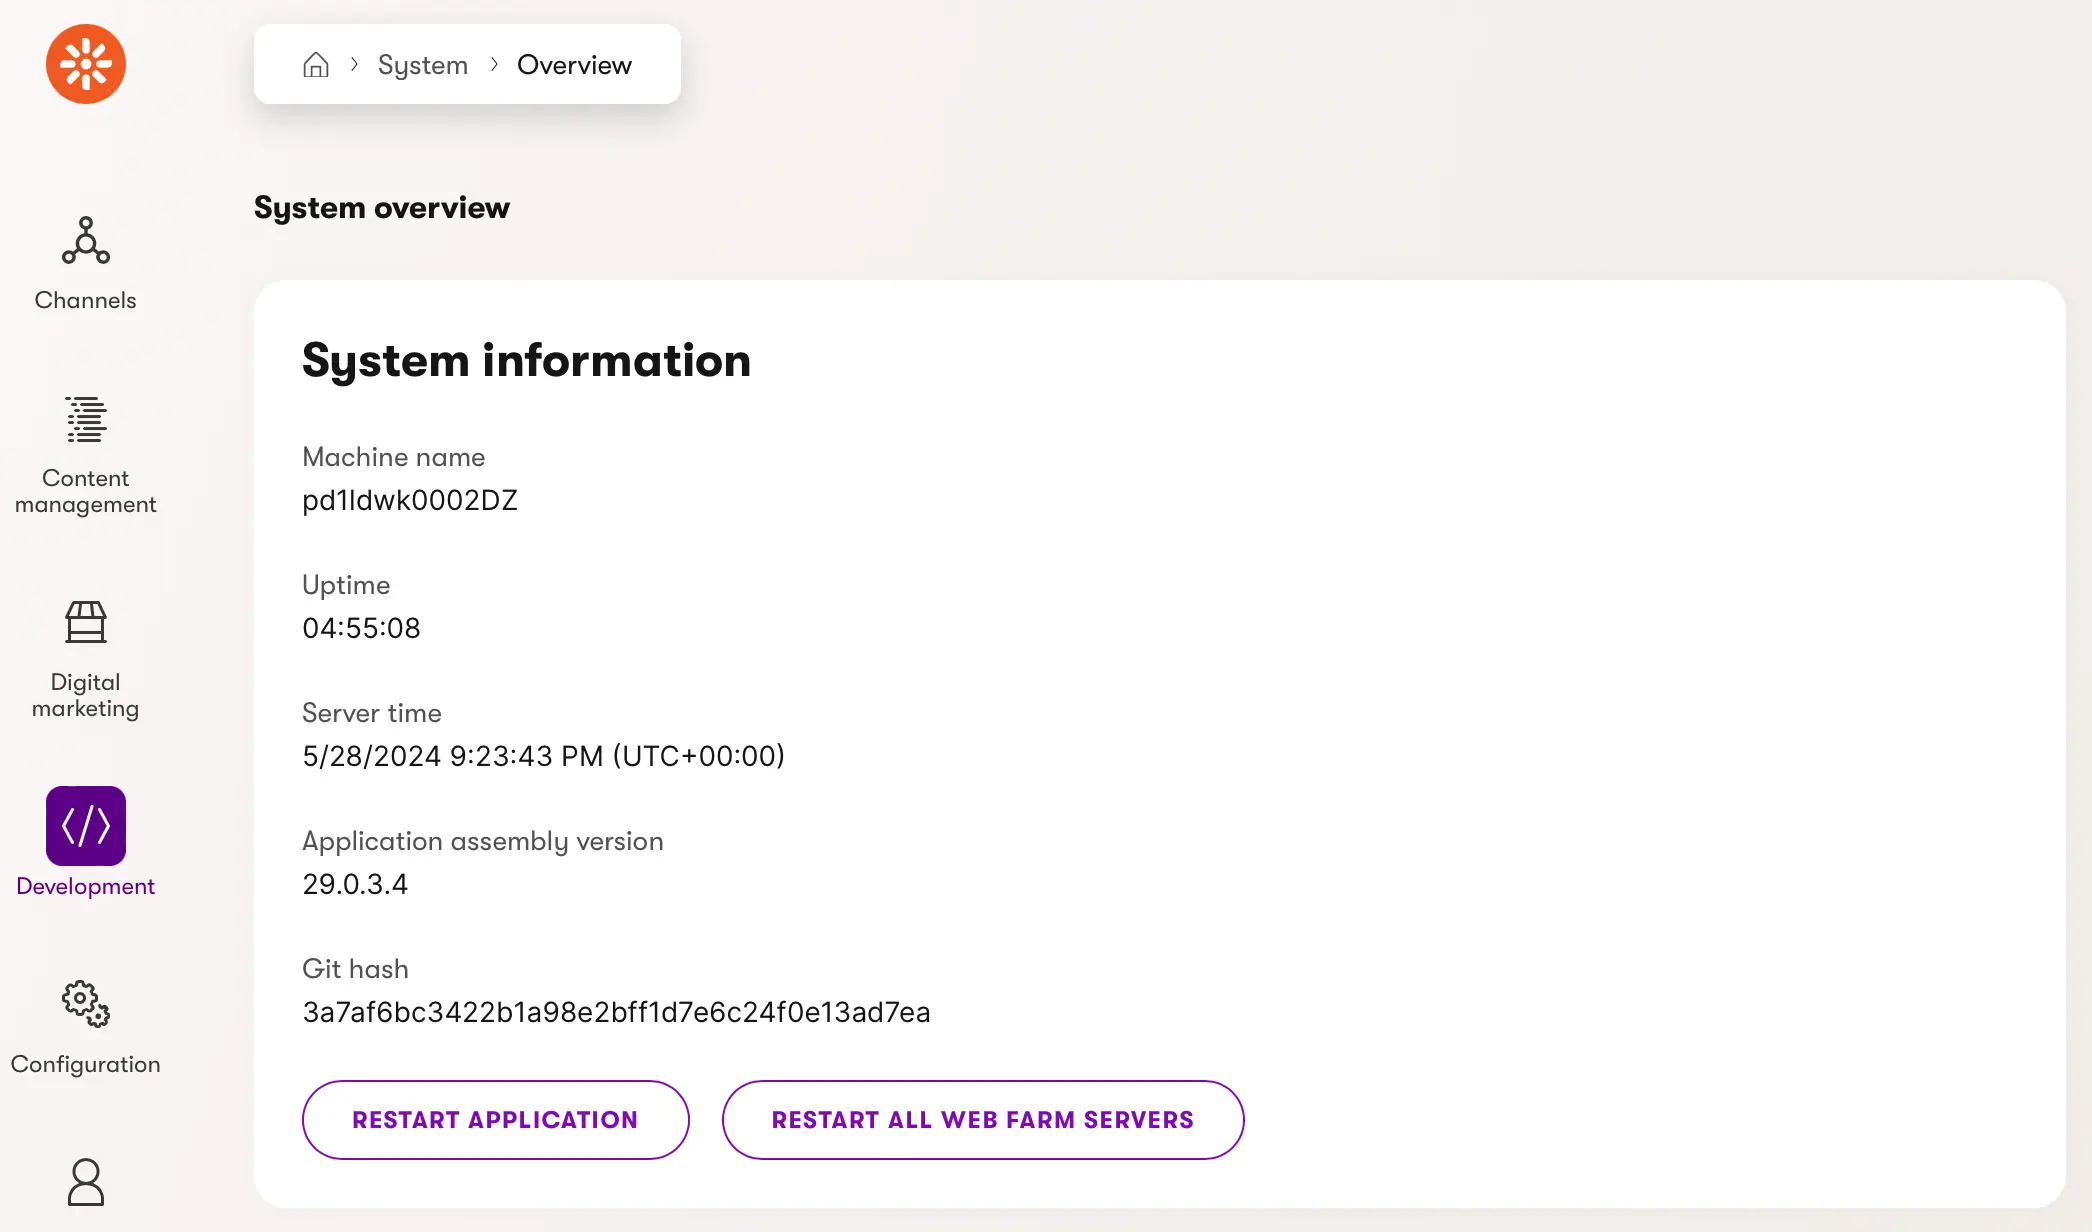
I'm going to spoil the surprise 😅 with a screenshot, showing we can do this by extending the System application's SystemOverview page and adding some metadata from our .NET build to the screen.
In the image above the "Application assembly version" is the version of our ASP.NET Core application assembly and the Git hash is... well, the hash in Git of the code currently running the Xperience by Kentico application.
Finding the UI Page
My process for extending UI Pages in the Xperience administration involves a few steps.
- Find the page in the UI that I want to extend by navigating to it in the Xperience administration
- Find the C# class that represents the page
- Decompile the page class in my IDE (using VS Code, ILSpy, ect...)
- Explore the page's publicly accessible properties, implementation details, and also visually review the UI created by the page
- Create a
PageExtenderclass that customizes the page using what I learned about it from the steps above
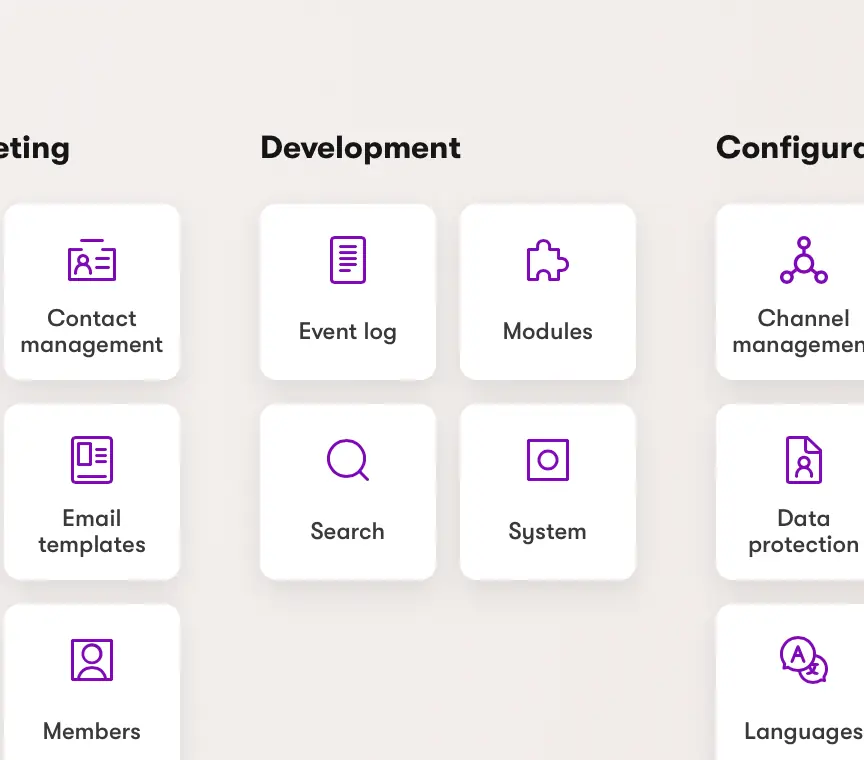
Using that process, we first identify the page we want to customize in the Xperience administration. Here's where the System application is found in the Xperience dashboard.
We know the page is likely the "system" page or related to it. All UI Pages in the Xperience administration can be found in the Kentico.Xperience.Admin.Base.UIPages namespace, so I'll type that namespace in my editor like I'm using it access a type and use intellisense to find the right page by naming convention 😉.
There are 2 types that have System in their name in this namespaces - SystemApplication and SystemOverview. "Application" pages in Xperience are usually container pages that have sub pages - they create a "visual" namespace and help create more complex UIs.
If we view the UI of the page displayed when we navigate to the System application from the dashboard we can see the breadcrumbs show we are redirected to the "Overview" page. Additionally, the URL ends in system-overview. This all tells me the SystemOverview type is the UI Page we want to extend 👍🏼.
We can also confirm this by decompiling the type and there are at least two easy ways to confirm this in VS Code.
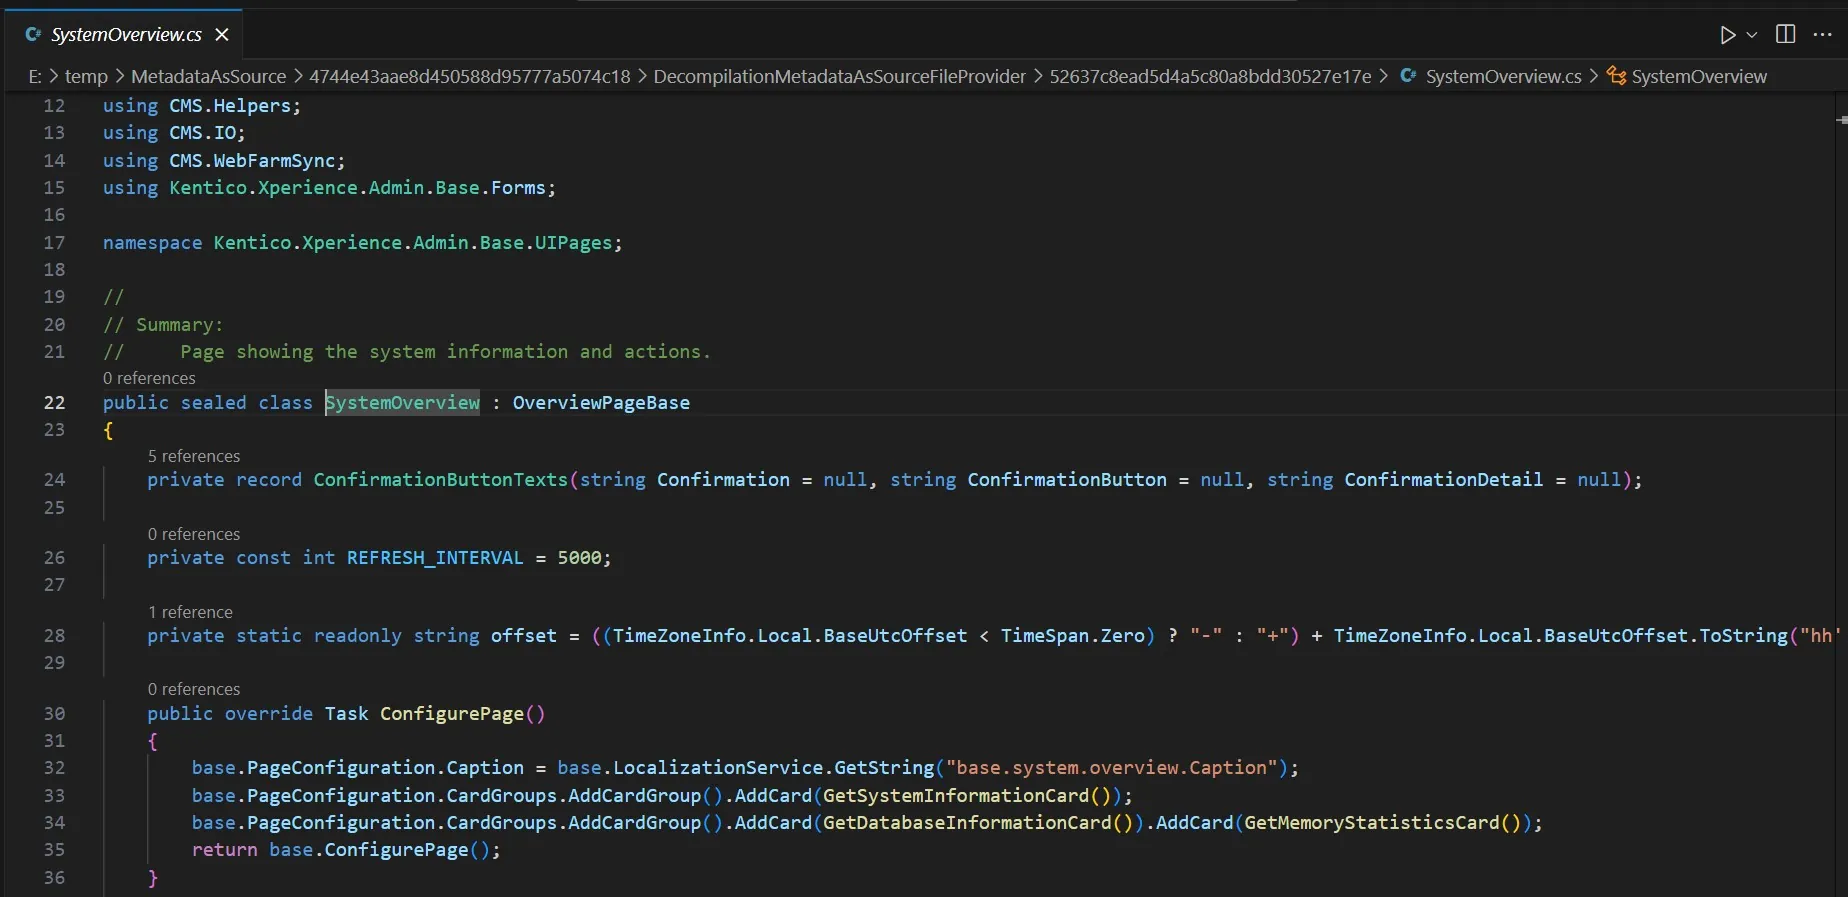
The first, using the C# DevKit VS Code extension, requires us to place our cursor on the SystemOverview type name, and press the F12 key which opens the decompiled class in a new editor tab.
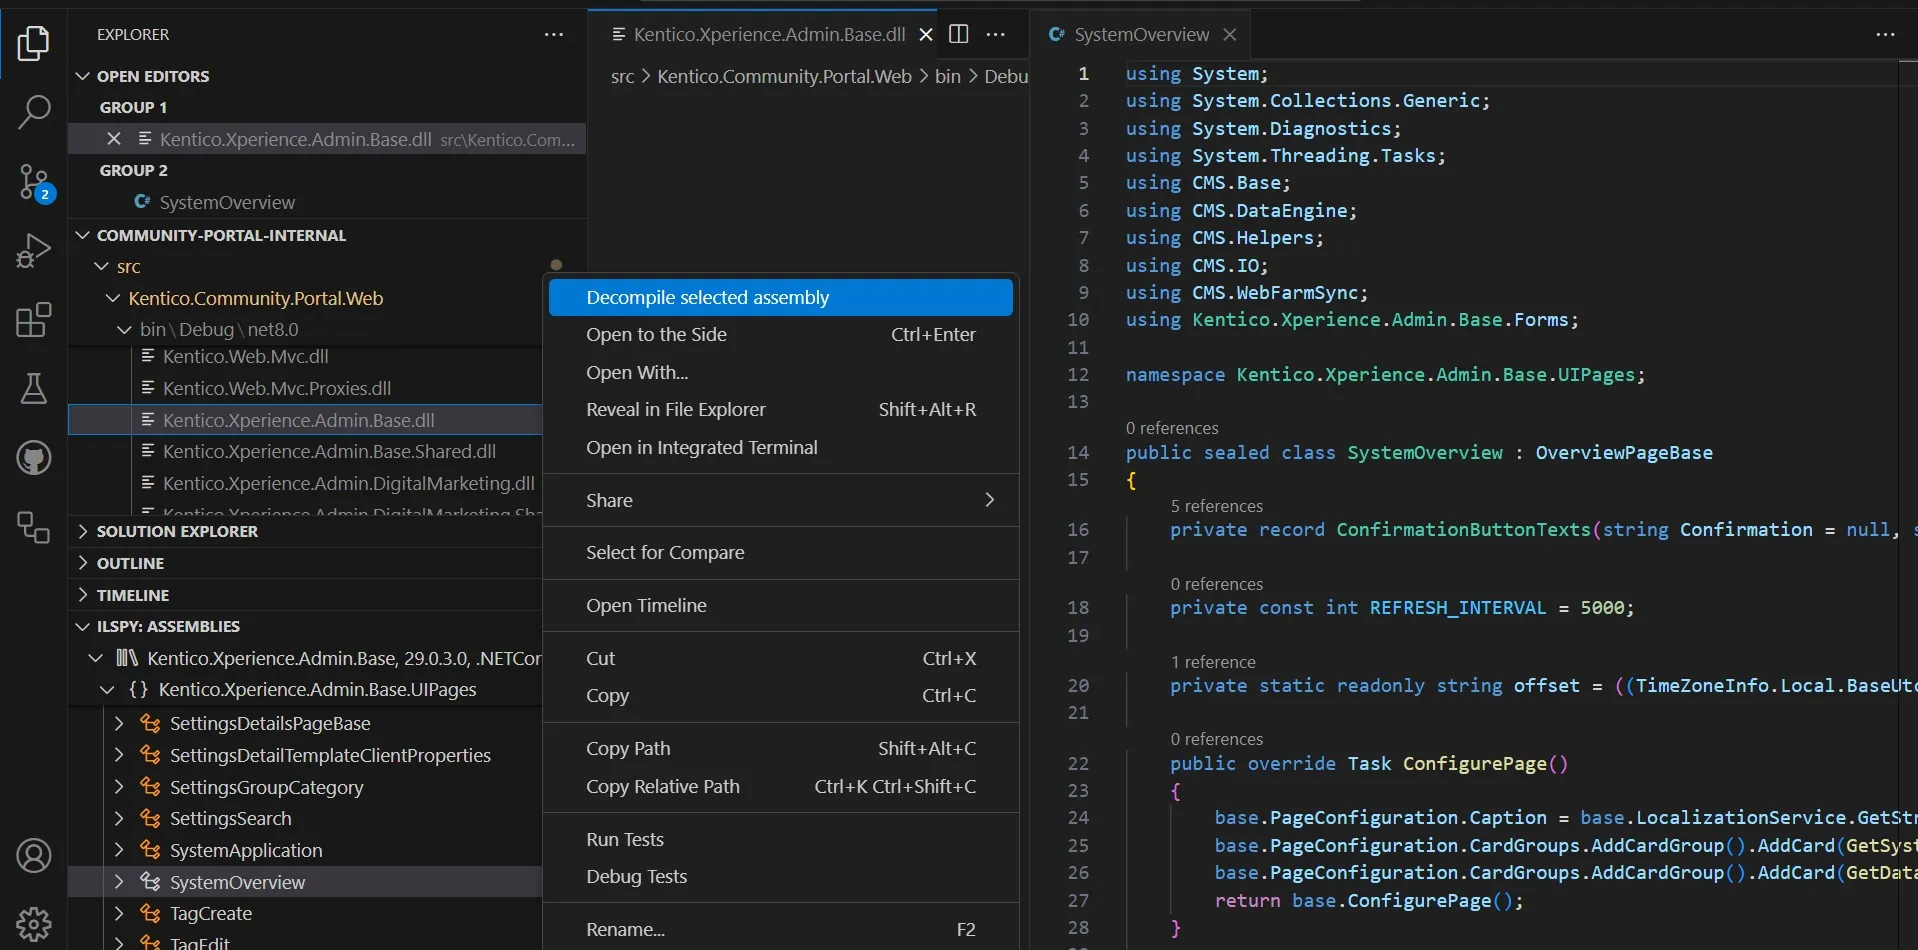
An alternative is to use the VS Code ILSpy extension to decompile the Kentico.Xperience.Admin.Base.dll assembly (accessible in your ASP.NET Core app's \bin\Debug\net8.0\ folder) and navigate to the Kentico.Xperience.Admin.Base.UIPages namespace and the SystemOverview type.
The first option is quicker and more precise, but requires you know the type you are looking for already. The second option requires a few more steps but is great for exploration 🗺.
In either case, we will see a ConfigurePage method. This is where UI Pages perform most of their setup. In the SystemOverview class' ConfigurePage method, 2 "Card Groups" and 3 "Cards" are added to the page configuration with the cards being "System", "Database", and "Memory Statistics". This matches up with the layout of the UI, so we're on the right track 😎.
Before we dig into extending the page, we want to decide how we'll access the deployment and build information we want to display. Fortunately, .NET does a lot of this for us!
.NET SDK and Source Link
Source Link is a technology that embeds Git information in .NET assemblies and symbol files (.pdb) so that developers can debug into compiled libraries. If you haven't used it yet, definitely spend some time exploring it and configuring your IDE to use it.
In .NET 8 Source Link was turned on by default which means if you are using the .NET 8 SDK to build your Xperience by Kentico solutions, your Git commit hash is already embedded in the assembly metadata.
The question is ... where 🤔?
Well, if we use the ILSpy VS Code extension and decompile our own assembly built in the .NET 8 SDK (right click on a .dll file in the VS Code Explorer and select "Decompile selected assembly), we can see the root level assembly information as a bunch of assembly attributes.
This example uses the Kentico.Community.Portal.Core assembly.
// Kentico.Community.Portal.Core, Version=29.0.3.2, Culture=neutral, PublicKeyToken=null

// ...

[assembly: TargetFramework(".NETCoreApp,Version=v8.0", FrameworkDisplayName = ".NET 8.0")]
[assembly: AssemblyDiscoverable]
[assembly: AssemblyCompany("Kentico.Community.Portal.Core")]
[assembly: AssemblyConfiguration("Debug")]
[assembly: AssemblyFileVersion("29.0.3.2")]
[assembly: AssemblyInformationalVersion("29.0.3.2+b3c1e7f8d97db90027cd8d2fb4e7be758fec38bf")]
[assembly: AssemblyProduct("Kentico.Community.Portal.Core")]
[assembly: AssemblyTitle("Kentico.Community.Portal.Core")]
[assembly: AssemblyVersion("29.0.3.2")]

// ...
Notice the AssemblyInformationalVersion attribute has the AssemblyFileVersion followed by a + and what appears to be a Git hash (because it is a Git hash)!
We just need to use .NET reflection to access that attribute's value at runtime, parse the value into 2 segments, and then display it in the administration UI with our PageExtender.
Parsing the AssemblyInformationalVersion
Thankfully, someone has already done the hard work here - the world renown 🏆 Scott Hanselman solved the problem several years ago.
I've simplified his solution below.
/// <summary>
/// Exposes the current entry assembly's version and git hash information
/// </summary>
/// <remarks>
/// See https://www.hanselman.com/blog/adding-a-git-commit-hash-and-azure-devops-build-number-and-build-id-to-an-aspnet-website
/// </remarks>
public class ApplicationAssemblyInformation
{
    public ApplicationAssemblyInformation()
    {
        // Dummy version for local dev
        string versionAndHash = "1.0.0+NO_COMMIT";

        string infoVersion = Assembly.GetEntryAssembly()
            ?.GetCustomAttributes<AssemblyInformationalVersionAttribute>()
            .Select(a => a.InformationalVersion)
            .FirstOrDefault() ?? "";

        if (0 < infoVersion.IndexOf('+') && infoVersion.IndexOf('+') <= infoVersion.Length)
        {
            // Hash is embedded in the version after a '+' symbol, e.g. 1.0.0+a34a913742f8845d3da5309b7b17242222d41a21
            versionAndHash = infoVersion;
        }

        Version = versionAndHash[..versionAndHash.IndexOf('+')];
        GitHash = versionAndHash[(versionAndHash.IndexOf('+') + 1)..];
    }

    /// <summary>
    /// The git hash of the code that the application's Entry Assembly was generated from
    /// </summary>
    public string GitHash { get; }
    /// <summary>
    /// The version of the application's Entry Assembly
    /// </summary>
    public string Version { get; }
}
We can either "new" up an ApplicationAssemblyInformation instance every time we need it, make it a static class, or add it as a singleton to our DI container (which is the approach I choose here).
services.AddSingleton(s => new ApplicationAssemblyInformation())
Now, let's get back to creating our PageExtender.
The System Overview Extender
First, we'll create a new SystemOverviewExtender.cs file and C# class.
using DancingGoat.Admin.UIPages;
using Kentico.Xperience.Admin.Base;
using Kentico.Xperience.Admin.Base.Forms;
using Kentico.Xperience.Admin.Base.UIPages;

[assembly: PageExtender(typeof(SystemOverviewExtender))]

namespace DancingGoat.Admin.UIPages;

public class SystemOverviewExtender(
    ApplicationAssemblyInformation assemblyInformation)
    : PageExtender<SystemOverview>
{
    private readonly ApplicationAssemblyInformation assemblyInformation = assemblyInformation;

    public override async Task ConfigurePage()
    {
        await base.ConfigurePage();

        // add customizations here
    }
}
We inject the ApplicationAssemblyInformation into the constructor and override the ConfigurePage method.
It's extremely important to await the base.ConfigurePage() method. The base class might not do any async work in ConfigurePage, but if it does and we don't await it, we will likely introduce a difficult to debug race condition since the page won't be completely "setup" by the time we start customizing it.
If we look back at the decompiled SystemOverview class, we can see the first card of the first card group is the "System Information" card.
base.PageConfiguration
    .CardGroups
    .AddCardGroup()
    .AddCard(GetSystemInformationCard());
This card has a list of components, each of which is a label/value line modeled as a TextWithLabelClientProperties.
overviewCard.Components = new List<IOverviewCardComponent>
{
    new FormCardComponent
    {
        Items = new TextWithLabelClientProperties[3]
        {
            CreateFormItem("label"), value)),
            // ...
        }
    }
};
We'll add 2 more TextWithLabelClientProperties to the Items list with our own labels and values
var component = Page.PageConfiguration
    .CardGroups.FirstOrDefault()?
    .Cards.FirstOrDefault()?
    .Components.FirstOrDefault();

if (component is not FormCardComponent cardComponent)
{
    return;
}

cardComponent.Items.Add(CreateFormItem(
    "Application assembly version", assemblyInformation.Version));
cardComponent.Items.Add(CreateFormItem(
    "Git hash", assemblyInformation.GitHash));
I've re-created the private CreateFormItem method from the original SystemOverview class so I can use it in the extender class.
private static TextWithLabelClientProperties CreateFormItem(string headline, string text) =>
    new()
    {
        Name = headline,
        Label = headline,
        Value = text,
        ComponentName = "@kentico/xperience-admin-base/TextWithLabel"
    };
And that's it 👏🏻... we just need to run our ASP.NET Core Xperience project and navigate to the the System application from the administration dashboard to see our build data.
Wrap up
We used the PageExtender to customize the System Overview page of Xperience's administration UI, adding information from our application build. This helps us know precisely what code is deployed to a specific environment. If you want to see how this is being used in the Kentico Community Portal, check out the source code on GitHub.

Sean Wright
I'm Lead Product Evangelist at Kentico. I'm part of the Product team at Kentico along with David Slavik, Dave Komárek, Debbie Tucek, Martin Králík, and Martina Škantárová. My responsibilities include helping partners, customers, and the entire Kentico community understand the strategy and value of Xperience by Kentico. I'm also responsible for Kentico's Community Programs.


